Thursday, August 9, 2007
It's an idea I stole....
...from my days at Girl Scout camp. You get your individual cereal box, cut an "I" shape into it with your pocket knife making sure not to pierce the bottom of the wax paper bag, and then you just add milk to the box and eat with a spoon! Fewer dishes to wash -- fewer dishes to carry too.
When I picked up my hamburger from the grocery store, I noticed that the container was a rigid plastic. Typically, to mix up burgers, habit would cause me to pop the meat into a bowl, and then start adding...but not this time! Mixing the burgers up in the container saved me a bowl and the splatter that sometimes happens too.
Simple, but Delicious Hamburgers
1 lb. extra lean ground beef (93% lean or leaner. Trader Joes has a great 96% lean)
2 T. Worcestershire sauce
1 T. minced fresh garlic (you can see, I'm not beyond buying the jar, even though fresh does taste best!)
2 t. minced dried onion or 1/4 small onion, chopped finely.
Salt and pepper
Remove the plastic cover from the meat. Check the underside of meat for a plastic/foam pad and remove if necessary. Add remaining ingredients and incorporate thoroughly. Pat into 4 or 5 patties. Grill or cook on stovetop till juices run clear. You can make 5 patties pretty easily out of an even pound. The reduced fat means that less cooks away.
It's generally not a good idea to eat rare burgers, and I particularly recommend cooking to at least medium if you do mix it in its packaging.
If you're trying to watch your waistline at summer barbecues, many stores offer a "light" bun option. It really is a good choice. I promise that you won't be able to detect a difference between the light white buns, and the regular white buns. In the process, you'll save about 30 calories per bun, too! And if you're like me and have a husband who won't necessarily stop at one burger, that's 60 calories saved for him.... Try it and let me know what you think!
Wednesday, August 1, 2007
Reality Bites....they sure are delicious!
Reality has set in. Of my myriad objectives when starting this blog, only one has been realized: I am cooking from scratch more. I am not shopping at the grocery store more effectively, and I am not doing a better job of maintaining kitchen inventory -- as shown in the post below -- but I am cooking more healthy foods, and keeping better tabs on what it is I'm eating.
The "King of Pancakes" was home for lunch today, and I had to scramble around to figure out what to have. Knowing that he was having a light week, I didn't concern myself with having bread or lunch meat for sandwiches...or anything else lunchy for that matter. I normally have leftovers enough for one in the fridge, or I can put together something "unique to my own tastes" without worry if I'm alone.
When I took stock of the fridge and pantry, I found the following:
Pasta, but no sauce.
Tuna, but no salad greens or bread
A few cherry tomatoes that were on their last day
One lonely egg in a carton
Frozen meats and vegetables.
After a moment of head scratching, I had it! Tuna pasta salad!
To save dishes, I first rinsed the egg off and gave it a light scrubbing with some vinegar....you'll see why in a minute!
Ingredients
1 2 quart saucepan, filled halfway with cold water
1 egg, rinsed in a little bit of water and white vinegar
1 1/2 c. dry bite-sized pasta
1 can of tuna packed in water, drained
6 cherry tomatoes, halved or quartered, depending on size.
2 T. fat free mayonnaise
1/4 c. shredded light cheese
1/4 small onion, chopped finely
Salt and Pepper
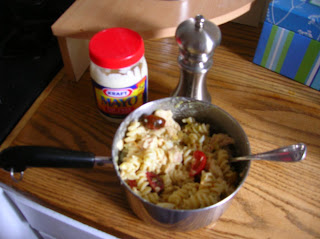
Place the saucepan on the stove, and carefully drop in the egg. Turn the oven to medium high heat. Once the water starts to boil, add in the pasta, and allow the egg to continue to cook for up to 10 minutes while the pasta cooks. Remove the egg, and drain the cooked pasta. Add a few ice cubes to the saucepan, with enough water to cover the egg. Cool the egg quickly in the ice bath, adding more ice if the ice melts. Once the egg is cool, dump the water. Peel the egg, and chop into small cubes. Add chopped egg and pasta back to the pan, and mix in the remaining ingredients. Allow to sit in the refrigerator, covered, for at least 15 minutes so that flavors can mingle. Stir again before serving. Serves 2 to 3.
Optional add ins: chopped olives, chives, cayenne pepper, celery, bell pepper
Subscribe to:
Posts (Atom)