Tuesday, December 18, 2007

Merry Christmas, a week early...


Zeke is ready for Christmas!

Despite a little bit of asynchrony at the beginning, our Christmas Party went exceptionally well. The conversation was lively, the ornaments were sparkling, and the food was delicious!

The big hit of the night appeared to be the chili. My vegan chili recipe came directly from me not knowing anything other than the fact that I like chili, but I like it to be healthy. I also like colorful foods. The chili is all of the above! Plus it's easy to expand to serve as many people as you like....provided you have enough pots and pans to cook it in...

Ren's Vegan Chili
for every six servings you need:
2 teaspoons margarine
1/2 medium onion, chopped
1 clove of garlic, crushed
1 bell pepper chopped (I start with a green, and then add yellow, orange, and finally red if I'm going from 6 to 12 to 18 to 24 servings)
1 19oz can of diced, unsalted tomatoes
1 can chickpeas
1 can black beans
1 can dark red kidney beans
1 1/2 tablespoons chili powder
cayenne, salt, and black pepper to taste

In a medium-sized pot or dutch oven, melt the margarine. Sautee the onions, garlic, and pepper until carmelized. Add the tomatoes, and allow to simmer for 15 minutes, stirring occasionally. While the tomatoes simmer, drain and rinse the beans. This is critical, as kidney beans in particular come packed in corn syrup, and nobody needs that sugar!

Once the beans are rinsed and drained, stir them into the pot, followed by the chili powder. Season otherwise to taste. Allow to simmer for a minimum 15-20 minutes before serving. As most things of this nature go, the chili is best made a day ahead. Serve over crumbled corn muffins with cheese and sour cream. (Which, by the way, I completely forgot to put out for the party! Remember that out-of-whack start? Yeah...)

Cheddar broccoli soup had also been on my mind these past few weeks, however, when I went to buy the broccoli, there was none to be had. Briefly I converted my plan to a cauliflower carrot soup, but held out hope for broccoli to magically appear -- and sure enough it did!

This recipe is similar to my earlier recipe for cheese soup, however this time I substituted some Fat Free evaporated milk for some of the skim milk, to add some richness.

Ren's Reduced Fat Rich Cheese and Broccoli Soup

6 cans of evaporated milk, heated but not simmering
1 quart skim milk
2 teaspoons prepared yellow mustard
1.5 lbs of shredded sharp cheddar cheese, tossed with 1 1/4 cups of all-purpose flour
2 bags of frozen broccoli florets
1 teaspoon cayenne pepper
salt and pepper to taste

Blend the milks in a saucepan, and heat over medium-low until steam just rises from the top. Increase the heat to medium, and whisk in the mustard and shredded cheese.

**Space-saver/dish-saver TIP! Buy the pre-shredded cheese, and add the flour directly to the zipper bags. Shake to coat evenly, and then pour right into the pot!

Once the cheese has melted, add the broccoli, and return to medium-low, stirring periodically, and watching to ensure the soup does not boil. This transfers extremely well to a crock pot on low once the cheese has been melted in. Season with cayenne, salt, and pepper. Allow to cook until broccoli is tender -- roughly 40 minutes. Serve with crackers or breadsticks.

Friday, December 14, 2007

Coming back again....

It's been a long two months off. My apologies, but food and I have had to renegotiate our relationship in some serious ways. Sure makes it hard to plan out a food blog, when you don't even know what you can eat!

But, things are evening out yet again, and hopefully we'll be able to be back, in force, starting with this weekend's event: Our annual ornament exchange!

The Menu:
Chex Mix (the real kind...not out of a bag!)
Chex Muddy Buddies
Oreo Truffles
Ren's Easy Vegan Chili
Ren's 3C Soup (Cauliflower, Carrots, and Cheese!)
Corn Muffins
Breadsticks
A special offering from my friend Jen, the
Beantown Baker!
Oh, and of course, chocolates.

I have a love/hate relationship with Chex Mix. I love eating it. It may be one of the most delicious things I have ever experienced. But, I hate Chex as a cereal. Until now, I have always had to find a way to choke down the leftover Chex, or watch it go to waste, taking up precious room, on my small kitchen shelf. But no longer!

Careful merging of the two recipes currently found on the back of the Rice Chex and Wheat Chex boxes allows for 100% utilization of said Chex in delicious ways! You just have to know what to omit....

Grocery List

1 Large box of Rice Chex
1 Regular box of Wheat Chex
2 sticks of margarine or butter
Worcestershire sauce
Peanut butter
Chocolate chips
Unsalted Cashews or Peanuts
Pretzel nuggets (small ones)
Onion Powder
Garlic Powder
Seasoned Salt

Chex Mix -- the efficient variation!

Ingredients:
6 tablespoons butter or margarine
2 tablespoons Worcestershire sauce
1 1/2 teaspoons seasoned salt
3/4 teaspoon garlic powder
1/2 teaspoon onion powder
4 cups Rice Chex® cereal
5 cups Wheat Chex® cereal
1 1/2 cup mixed nuts
1 1/2 cup bite-size pretzels


Preparation Directions:
1. Heat oven to 250°F. In ungreased large roasting pan, melt butter in oven. Stir in seasonings. Gradually stir in remaining ingredients until evenly coated.
2. Bake 1 hour, stirring every 15 minutes. Spread on paper towels to cool, about 15 minutes. Store in airtight container.
Microwave Directions: In large microwavable bowl, microwave butter uncovered on High about 40 seconds or until melted. Stir in seasonings. Gradually stir in remaining ingredients until evenly coated. Microwave uncovered on High 5 to 6 minutes, thoroughly stirring every 2 minutes. Spread on paper towels to cool. Store in airtight container.

1 Serving: Calories 140 (Calories from Fat 60); Total Fat 6g (Saturated Fat 2 1/2g, Trans Fat 0g); Cholesterol 10mg; Sodium 330mg; Total Carbohydrate 17g (Dietary Fiber 2g, Sugars 2g); Protein 3g Percent Daily Value*: Vitamin A 6%; Vitamin C 2%; Calcium 4%; Iron 25% Exchanges: 1 Starch; 0 Other Carbohydrate; 0 Vegetable; 1 Fat Carbohydrate Choices: 1
*Percent Daily Values are based on a 2,000 calorie diet.


Muddy Buddies -- Again, efficiency style!

Ingredients:
All remaining Chex
1 cup semisweet chocolate chips
1/2 cup peanut butter
1/4 cup butter or margarine
1 teaspoon vanilla
1 1/2 cups powdered sugar


Preparation Directions:
1. Dump cereal into a large bowl; set aside.
2. In 1-quart microwavable bowl, stir together chocolate chips, peanut butter and butter. Microwave uncovered on High 1 minute; stir. Microwave about 30 seconds longer or until mixture can be stirred smooth. Stir in vanilla. Pour mixture over cereal, stirring until evenly coated. Pour into 2-gallon resealable food-storage plastic bag.
3. Add powdered sugar. Seal bag; shake until well coated. Spread on waxed paper to cool. Store in airtight container in refrigerator.

1 Serving: Calories 220 (Calories from Fat 80); Total Fat 9g (Saturated Fat 4g, Trans Fat 0g); Cholesterol 5mg; Sodium 200mg; Total Carbohydrate 30g (Dietary Fiber 1g, Sugars 17g); Protein 3g Percent Daily Value*: Vitamin A 6%; Vitamin C 2%; Calcium 6%; Iron 25% Exchanges: 1 Starch; 1 Other Carbohydrate; 0 Vegetable; 1 1/2 Fat Carbohydrate Choices: 2

Tomorrow, we'll have the soups -- and pics!

Thanks for reading...happy eating! :)

Monday, October 8, 2007

My other boyfriend is Trader Joe.

I love Trader Joe's. If you live in the Pittsburgh area and haven't made the trek to the Trader Joe's on Penn Avenue yet, you should. You probably own a car, so going there and loading up will make the trip well worth it!

Why is it worth this trip? Trader Joe's specializes in inexpensive, natural foods, many of which are also organic. It also caters to those with special dietary needs who would otherwise find themselves going broke at "Whole Paycheck". In fact, many of the foods that Trader Joe's carries are manufactured by makers you already trust and love, but with the artificial colors, flavors, and preservatives removed.

This recipe features many of the good things Trader Joe's has to offer, and shopping for the ingredients will give you a tour of most of the store! If you don't have a TJ's nearby, just approximate with my notes.

Asian-style Vegetable Soup

1 container TJ's Ginger Soy broth
1/2 teaspoon cayenne pepper
1/2 teaspoon ground ginger
1 teaspoon sesame oil
1 package TJ's Harvest Mix Vegetables (broccoli, carrots, water chestnuts, onions, peppers, and mushrooms -- Birds Eye has a similar mix)
1/2 package extra firm tofu, cubed OR 1/2 pound of frozen uncooked shrimp
1/2 package TJ's rice stick noodles
3 green onions, snipped into 2 inch lengths
4 pieces of fresh cilantro

In a 4 quart pan, combine the first three ingredients, and bring to a simmer. Add the vegetables and shrimp if using. If using tofu, heat 2 teaspoons canola or olive oil plus a drop of sesame oil in a pan. Cook tofu cubes to remove excess moisture and until just browned.

When Shrimp starts to turn pink, or when broth begins to simmer again, add noodles. Also add tofu at this time if using. Allow to simmer 7 minutes, until noodles are soft. Remove from heat and add green onions and cilantro, stirring them in. Allow to sit 3-4 minutes.

Serve hot. Serves 6, and when made with tofu, the whole pot will cost you about $5 to make!

Saturday, October 6, 2007

Pie...it does a body good.

There have been changes afoot around the Small Space Kitchen. With some health changes has come eating changes, and so the Kitchen is headed toward a vegetarian theme. I still have chicken in my freezer, though, so until that runs out, there will be some more meaty things coming down the line.

But today we have a personal favorite, Peach-raspberry pie. I love pie. Love. It. I also love hitting the jackpot at the Haymarket and getting 5 beautiful, gigantic, freestone peaches for $2, and a container of raspberries for $.75.

Peach pie is one of those things that often gets lost in the shuffle. In a lot of ways it's the "middle child" in the pie triumvirate which includes apple and cherry. Strawberry pies don't often compete, as they're not usually a baked pie, and blackberry pies due to rarity have the benefit of novelty.

Why do peaches lose out? It's hard to say, especially since when done right, they are much easier to prep for a fresh fruit pie than apples or cherries. And after you read through tutorial and recipe, however, I'm sure peaches will hit higher on your pie radar!

Step 1: Start with the right fruit. There are two main types of peaches you'll encounter, freestone and cling. You may have seen these words appear on canned peaches and wondered what they meant. While it means little to you the consumer of a canned, pitted fruit, the difference becomes apparent when working with the fresh, whole fruit! Freestone peaches develop so that the flesh is free from the stone -- the stone being the pit. Cling, on the other hand, are the peaches whose fruit comes away from the pit in clumps, giving the would-be pie-maker a much more difficult task. Ask your produce person before buying to make sure.

Step 2: Be a blancher, not a fighter. When you get your peaches home, rinse dirt from peaches under running tap water in the sink. Then either boil water in a tea kettle or pot, and then pour the boiling water over the peaches, or place them in the boiling pot for 3 minutes. Blanching your peaches allows the skin to peel off easily with your fingertips or the help of a small knife. Either way, the blush of the skin should decrease a bit as you boil the fruit -- this is simply the translucent skin pulling away from the flesh. A uniform translucency tells you your peaches are ready.

Step 3: Slice! Be careful, as the blanched skinless peaches are slippery. Firmly keeping a finger in the stem end will do the least damage to your fruit as you slice the fruit off of the stone.

Once you've sliced your peaches, toss them with some lemon juice to prevent browning. Sliced peaches may be refrigerated overnight if you want to spread the workload over two days. Here again they out-do apples -- refrigerated peaches retain their texture and flavor much better than apples.

Where do the raspberries come in? While I love peaches, they are often a very straight-line sweet flavor. The raspberries add a touch of tang and depth, making what would be a very good pie truly memorable. It doesn't take many raspberries to add zest to the pie.....just toss them thoroughly with the peaches to get good distribution.

And the recipe:

Peach-Raspberry Pie

INGREDIENTS


  • 1 (15 ounce) package pastry for a 9 inch double crust pie

  • 1 egg, beaten

  • 5 cups sliced peeled peaches (4 extra large, or 6 medium)

  • 1/2 cup fresh raspberries, picked over and rinsed

  • 2 tablespoons lemon juice

  • 1/2 cup all-purpose flour

  • 1 cup white sugar

  • 1/2 teaspoon ground cinnamon

  • 1/4 teaspoon ground nutmeg

  • 1 tablespoon butter (optional)


  • DIRECTIONS
    Preheat the oven to 450 degrees F (220 degrees C).
    Line the bottom and sides of a 9 inch pie plate with one of the pie crusts. Brush with some of the beaten egg to keep the dough from becoming soggy later. Prick with fork to prevent bubbles.

    Place the sliced peaches in a large bowl, and sprinkle with lemon juice. Mix gently. In a separate bowl, mix together the flour, sugar, cinnamon, and nutmeg. Pour over the peaches, and mix gently. Pour into the pie crust, and dot with butter. Cover with the other pie crust, and fold the edges under. Flute the edges to seal or press the edges with the tines of a fork dipped in egg. Brush the remaining egg over the top crust. Cut several slits in the top crust to vent steam.

    Bake for 10 minutes in the preheated oven, then reduce the heat to 350 degrees F (175 degrees C) and bake for an additional 30 to 35 minutes, until the crust is brown and the juice begins to bubble through the vents. If the edges brown to fast, cover them with strips of aluminum foil about halfway through baking. Cool before serving. This tastes better warm than hot.

    picture to come!

    Monday, September 17, 2007

    Vegetarian Delight


    This summer we spent a week with my in-laws in beautiful Traverse City, Michigan. The Cherry Capital hosts the National Cherry Festival each July, and the fruit-related fun doesn't end there. The area is truly amazing, with its fresh fruits and vegetables coming from a multitude of local farms and orchards.

    One morning, the King of Pancakes' parents went out to a local farmers' market and brought back, among a load of other fresh loot, nearly a dozen beefsteak tomatoes. His mom had found a recipe in a Parade Magazine she'd wanted to try, which is my feature today. We packed it up and took it to the beach at Cathead Bay, but it is colorful enough to serve as part of a brunch or lunch occasion, and simple enough for everyday if you use pre-made ingredients.

    The recipe recommends beefsteak or heirloom tomatoes, however if you want to make this an appetizer of more manageable proportions, I recommend ripe Roma tomatoes cut into rings.

    Triple Threat Tomatoes

    8 large ripe tomatoes, 3 inches in diameter (roughly 4 pounds, if you want to go smaller)
    3/4 c. Chickpea Slather (recipe follows) or your favorite hummus
    3/4 c. Kalamata Olive Spread (recipe follows)
    3/4 c. pesto (store-bought, or use your favorite recipe)
    One basil leaf for garnish

    Cut each tomato into three 1/2 inch slices if using large tomatoes. 1/4 inch if using small ones. Divide into 3 groups, and top with 1 T. for large slices, or 1 t. for small, some with each of the three toppings. Or, as we discovered, allow your guests to top as they desire. Several of us loved them with all three toppings combined, and it looked lovely.

    Chickpea Slather (none of us liked this name, but we did like the taste!)

    1 can (15 oz) chickpeas (garbanzos), rinsed well and drained
    1/4 c. sesame tahini
    3 T. warm water
    3 T. extra-virgin olive oil
    Zest of 1 lemon
    Juice of 1 1/2 lemons
    2 t. finely mince garlic
    1 t. ground cumin
    Salt and pepper to taste

    Process all of the ingredients in a food processor or blender until smooth. Store, covered, in the refrigerator for up to a week. Prepare at least several hours ahead for the best flavor.

    Kalamata Olive Spread

    1 c. pitted Kalamata olives
    3 cloves of garlic, peeled
    2 T. extra-virgin olive oil
    2 T. fresh lemon juice
    2 T. chopped fresh oregano or 1/2 t. dried
    2 T. chopped flat leaf parsley

    Combine all of the ingredients in a food processor or blender until just pureed (use the pulse function for best results.) Store, covered, in the refrigerator for a week as well.

    Serve the topped tomatoes with a sliced baguette, and you will think you've been transported to Europe! Yum!

    Wednesday, September 12, 2007

    Small Space Field Trips!


    I've spent a bit of time out of my own kitchen this summer, but in the kitchen nonetheless! One recent Thursday evening, several girlfriends (and their girlfriends) and I did about two weeks worth of meal prep in four hours at a place called "Let's Dish". This is a really great idea. For $96, you get four six-serving meals that YOU assemble, so you can control the amount of things like fat and sodium, and mushrooms that go into your meals! Not sure you want to go that far your first time, share the experience with a friend and take half the food home. Or, if you love it, split the 12-meal deal with friends and decrease your per-meal cost. Really, you can't lose.

    So the good stuff -- I came home with my coolers full of chicken chili (hence my pose with the cumin canister), cheesy lasagna roll-ups, crabcakes, and tonight's dinner -- shrimp scampi linguine.

    Shrimp Scampi Linguine

    2 cups cooked, hot linguine

    1 cup canned crushed tomatoes
    1/2 tablespoon minced garlic
    1/4 teaspoon red pepper flakes (adjust to your taste)
    1 teaspoon butter
    1/2 lb. frozen uncooked shrimp (tails optional)
    1/4 cup white wine or broth
    2 slices of lemon, about 1/8 in. thick
    2 tablespoons fresh parsley or 2 teaspoons dried

    While you wait for your water to boil, combine the tomatoes, garlic, and butter or olive oil in a saucepan. When it begins to simmer, put your noodles in the water and add the shrimp, wine, lemon, and parsley to the saucepan. Simmer 8-10 minutes until shrimp is pink. Turn off heat, remove from hot burner if using an electric stove. Drain pasta. Serve shrimp and sauce over pasta with parmesan cheese.

    More recipes from my travels are on their way!

    Thursday, August 9, 2007

    It's an idea I stole....


    ...from my days at Girl Scout camp. You get your individual cereal box, cut an "I" shape into it with your pocket knife making sure not to pierce the bottom of the wax paper bag, and then you just add milk to the box and eat with a spoon! Fewer dishes to wash -- fewer dishes to carry too.

    When I picked up my hamburger from the grocery store, I noticed that the container was a rigid plastic. Typically, to mix up burgers, habit would cause me to pop the meat into a bowl, and then start adding...but not this time! Mixing the burgers up in the container saved me a bowl and the splatter that sometimes happens too.

    Simple, but Delicious Hamburgers

    1 lb. extra lean ground beef (93% lean or leaner. Trader Joes has a great 96% lean)
    2 T. Worcestershire sauce
    1 T. minced fresh garlic (you can see, I'm not beyond buying the jar, even though fresh does taste best!)
    2 t. minced dried onion or 1/4 small onion, chopped finely.
    Salt and pepper

    Remove the plastic cover from the meat. Check the underside of meat for a plastic/foam pad and remove if necessary. Add remaining ingredients and incorporate thoroughly. Pat into 4 or 5 patties. Grill or cook on stovetop till juices run clear. You can make 5 patties pretty easily out of an even pound. The reduced fat means that less cooks away.

    It's generally not a good idea to eat rare burgers, and I particularly recommend cooking to at least medium if you do mix it in its packaging.

    If you're trying to watch your waistline at summer barbecues, many stores offer a "light" bun option. It really is a good choice. I promise that you won't be able to detect a difference between the light white buns, and the regular white buns. In the process, you'll save about 30 calories per bun, too! And if you're like me and have a husband who won't necessarily stop at one burger, that's 60 calories saved for him.... Try it and let me know what you think!

    Wednesday, August 1, 2007

    Reality Bites....they sure are delicious!


    Reality has set in. Of my myriad objectives when starting this blog, only one has been realized: I am cooking from scratch more. I am not shopping at the grocery store more effectively, and I am not doing a better job of maintaining kitchen inventory -- as shown in the post below -- but I am cooking more healthy foods, and keeping better tabs on what it is I'm eating.

    The "King of Pancakes" was home for lunch today, and I had to scramble around to figure out what to have. Knowing that he was having a light week, I didn't concern myself with having bread or lunch meat for sandwiches...or anything else lunchy for that matter. I normally have leftovers enough for one in the fridge, or I can put together something "unique to my own tastes" without worry if I'm alone.

    When I took stock of the fridge and pantry, I found the following:
    Pasta, but no sauce.
    Tuna, but no salad greens or bread
    A few cherry tomatoes that were on their last day
    One lonely egg in a carton
    Frozen meats and vegetables.

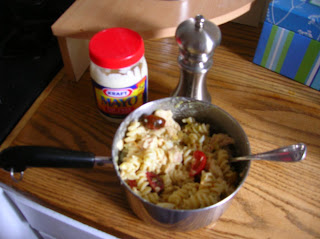
    After a moment of head scratching, I had it! Tuna pasta salad!

    To save dishes, I first rinsed the egg off and gave it a light scrubbing with some vinegar....you'll see why in a minute!

    Ingredients

    1 2 quart saucepan, filled halfway with cold water
    1 egg, rinsed in a little bit of water and white vinegar
    1 1/2 c. dry bite-sized pasta
    1 can of tuna packed in water, drained
    6 cherry tomatoes, halved or quartered, depending on size.
    2 T. fat free mayonnaise
    1/4 c. shredded light cheese
    1/4 small onion, chopped finely
    Salt and Pepper

    Place the saucepan on the stove, and carefully drop in the egg. Turn the oven to medium high heat. Once the water starts to boil, add in the pasta, and allow the egg to continue to cook for up to 10 minutes while the pasta cooks. Remove the egg, and drain the cooked pasta. Add a few ice cubes to the saucepan, with enough water to cover the egg. Cool the egg quickly in the ice bath, adding more ice if the ice melts. Once the egg is cool, dump the water. Peel the egg, and chop into small cubes. Add chopped egg and pasta back to the pan, and mix in the remaining ingredients. Allow to sit in the refrigerator, covered, for at least 15 minutes so that flavors can mingle. Stir again before serving. Serves 2 to 3.

    Optional add ins: chopped olives, chives, cayenne pepper, celery, bell pepper

    Monday, July 23, 2007

    The View From Up Here.....


    Sometimes I think the best feature of my kitchen is the view. If Edward Hopper were alive, and a had a ridiculous quantity of extra cash lying around, I would commission him to paint a painting of it -- enlarged to fit over the bed or a mantle.

    Other times, I think the best feature of my kitchen is my husband! Sunday morning I realized that we had neither liquid milk nor eggs, so breakfast was looking like a challenge. But my hubby is the King of Pancakes, and undaunted by the lack of eggs forged ahead, making these delicious peanut butter chocolate chip pancakes:

    Peanut Butter Chocolate Chip Pancakes

    Using a baking mix that calls for eggs and water or milk:

    1 3/4 c. pancake mix
    1 T. cinnamon (optional, but a good addition...trust me!)
    1 c. water
    1 t. vanilla
    1/4 c. peanut butter
    3/4 c. chocolate chips

    Using a fork, mix together the pancake mix and cinnamon. Stir in the water and vanilla. Fold in the peanut butter, incorporating completely, and then fold in the chocolate chips. On a preheated griddle, ladle on batter to form 4 inch circles. Using a spatula, push chocolate chips to disperse evenly throughout the pancakes. Turn when bubbles pop but stay open.

    Serve with maple or chocolate syrup!

    Makes 8-10 4-inch pancakes.

    Friday, July 20, 2007

    Honey, What's For Dinner?


    For dinner Friday, I whipped together a super simple baked honey mustard chicken. It's so easy to get into a barbecue sauce rut with chicken, and we'd recently had stir fry, so it was time for a little something different.

    Zeke the cat was enthralled with today's offering. It just smells good from the oven to the table. All you need is a chicken breast, honey, prepared mustard of any sort (I recommmend jalapeno mustard if you can find it!), salt, and pepper.

    Quick and Easy Honey Mustard Chicken

    For each boneless, skinless, chicken breast:

    2 teaspoons of honey
    2 teaspoons of mustard
    Salt and Pepper to taste

    Preheat oven to 350. Line a cookie sheet with foil. Trim visible fat from chicken. Drizzle honey and then mustard over the chicken breasts, sprinkle with salt and pepper. Use a butter knife to smooth the honey and mustard over the surface of the chicken. Place on the cookie sheet, and bake for 25 minutes if making up to 4 pieces, adjusting time upward as necessary if making more.

    So simple....

    Friday, July 13, 2007

    Faux Pas!

    So I don't have a picture of the final product of this recipe...my apologies. However I do have the nutrition analysis thanks to a friend, so hopefully that will paint a pretty enough picture of this delicious, rich, yet healthy cheese soup. Plus it's a bonus entry!

    And even better than that, you don't have to stick to what I put into the soup. By making it with broccoli and cauliflower, and maybe chicken, your possibilities really go through the roof. So yes, you can eat healthy and have cheesy creamy soup!

    I actually came up with this on Sunday night, after discovering the box of mac and cheese I'd planned to "doctor up" with some ham and peas had already been consumed....

    Cheese Soup With Ham, Peas, and Potatoes

    1 T Earth Balance spread (something with no trans-fats or sat-fats!)
    1/4 yelllow onion (medium-sized)
    1 T flour
    3 c. skim milk
    1 chicken boullion cube
    4 oz. reduced fat cheddar cheese, shredded or in small crumbles
    3 oz. lean cooked ham
    1 cup frozen small peas
    3 small potatoes or one large potato, baked or microwaved to soften, then cubed. (great for leftover baked potatoes)
    Black Pepper to taste

    IMPORTANT: Have all your ingredients measured and chopped before starting to cook. This recipe requires constant stirring and attention to temperature.

    In a 2-quart saucepan, melt the spread and sautee the onion until clear. Reduce the heat to medium-low. Sprinkle flour in, and mix with the butter. Steadily whisk in the milk, incorporating the butter and flour. Add the boullion cube. Maintain the mixture just steaming but below a simmer. You may have to turn your stove to low. Simmering will "break" or curdle the soup.

    Slowly add the cheese, about 1/2 an ounce at a time, continuing to whisk to incorporate. Allow the cheese to melt completely before adding more.

    Add the potato and peas, allow soup to come back to steaming. Add ham, allow soup to just steam again, season with pepper (the cheese and ham will probably add enough salt.)

    Serve immediately! Makes 3 1 1/2 cup servings.

    Nutrition Information:

    283 calories
    7g fat (2g saturated, 4g mono, 1g poly)
    19g cholesterol
    804mg sodium
    964mg potassium
    33g carbohydrates
    3g fiber
    21g protein

    If you break your cheese soup:

    Remove all meat and veggies from your soup and set aside. In another saucepan, bring 1 cup of milk to steaming. Whisk in your existing broth a little at a time. Add back your meat and veggies. That should do the trick. You may want to add another ounce of cheese to regain the flavor, but then you'd also be upping your servings or portion sizes. 1 ounce reduced fat cheddar and 1 cup of skim milk adds 160 calories and 6 grams of fat to the recipe as a whole.

    Wednesday, July 11, 2007

    Birthday Cake!


    Tomorrow's my husband's birthday -- his first married birthday to boot. Last year, I developed a special cake recipe just for him, incorporating all of his favorite flavors: spice, strawberry,and white chocolate, into something inspired by the local favorite, Boston Cream Pie. This year, recalling the obscene amount of cake the two of us tried to eat last July, and now having friends to share his birthday cake with, I opted for a cupcake version, and in the process, added some variety to the mix. You can try both, particularly if you enjoy a good spice cake! And yes, I use a mix.

    The cake itself doesn't have a name, feel free to send in some suggestions!

    Strawberry Spice Cake
    Heat oven to 375

    Cake:

    1 White pudding cake mix
    1 t. ground ginger
    1 t. ground cinnamon
    1/2 t. ground nutmeg
    1/2 t. ground cloves
    1/3 c. canola oil
    4 egg whites

    Grease and flour the bottoms of 2 9-inch round cake pans. Blend dry ingredients, then add oil and egg whites. Mix for 2 minutes on medium speed using an electric mixer, or 3 minutes by hand. Pour into pans. Bake according to package instructions until toothpick in center comes out clean. Turn out on racks, to cool thoroughly. Then wrap layers in plastic wrap and the foil, and freeze overnight.

    Filling:

    16 oz. frozen sliced strawberries with sugar, thawed.
    1 T. cornstarch dissolved in 1 T. water

    In a saucepan, over medium-low heat, warm strawberries. Blend in cornstarch solution. Keep mixture just below or at a bare simmer, stirring constantly until mixture thickens and clings to spoon, about 8 minutes. Set aside to cool to room temperature.

    Frosting:

    2 sticks (1/2 pound) unsalted butter, softened
    12 oz. white chocolate, melted and cooled slightly
    1 c. powdered sugar
    1 t. pure vanilla extract

    In a large bowl, using a handheld electric mixer, beat the butter at medium speed until creamy. Beat in the melted white chocolate. Add the confectioners' sugar and vanilla and beat at low speed, scraping the sides and bottom of the bowl, until light and fluffy. Keep at room temperature.

    To assemble the cake, unwrap frozen cake layers. Place first layer flat-side down on a plate. Spread a thin layer of frosting on the top, and then using a pastry bag, or a sandwich bag from which you've trimmed off a corner, to pipe a 1/4 inch ring of frosting around the edge. Spread a 1/4 inch layer of strawberry filling in the middle, and place the top layer, round side down, on top. Frost cake with remaining buttercream, and garnish top with fresh strawberries.

    Cake should be stored, loosely or tightly covered if not cut -- tightly covered if cut, in refrigerator. Beware of strong odors that may cross-contaminate the delicate frosting!

    The cupcakes work similarly. Again, I started with a white cake mix made according to the yolk-free instructions, but this time I divided it in half, keeping half white cake, and adding 1/2 the spices listed above to the other half. Using Wilton white cupcake papers, I baked the cupcakes according to package instructions, and cooled them. Again, I made the filling, but this time I ran it through a blender to puree the bigger strawberry bits. Using a pastry bag and the rose petal tip, I pressed the tip of the bag into the top center of each cupcake, injecting enough filling that I just started to see a slight crack at the top, repeating for all cupcakes, and filling the white cakes first.

    For frosting, I again opted for variety. I topped half of the white cupcakes with pre-made Sour Cream Chocolate frosting, and all remaining cupcakes with Cream Cheese Frosting.

    Feel free to experiment with any number of fillings! The combinations are nearly endless....

    Saturday, July 7, 2007

    "If You Want a Nourishing Fish Dish..."


    Today's title is a quote from one of the silliest songs I've ever enjoyed. It's called "Ahoy There!" by Mr. Scruff.

    Fish's many health benefits have been touted over the years, and in many places, a greater variety of fish has become available in grocery stores. While choosing local seafood can result in fresher taste, not every locale has this option. Also, trying new types of fish keeps the menu fresh. Today's recipe features mahi mahi, however it may be made with trout or tilapia.

    Mahi mahi has a firmer, more dense texture than trout, yet without the strong flavor of salmon or swordfish. This combination results in a fish that satisfies without being overwhelmingly "fishy". The seasoning you add here is the flavor you'll taste.

    Citrus Mahi Mahi -- serves two
    Oven at 450

    1/2 lb. filet of mahi mahi, boneless and skinless
    1 t. grated lemon zest
    1 t. grated lime zest
    1 t. onion powder
    1 t. salt
    1 t. black or white pepper
    1 pat (roughly 1/2 tablespoon) butter or margarine.
    1 T. Lime juice (or juice from two limes)
    1 t. lemon juice
    2 Clementines, cut into quarters

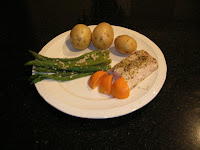
    Place the mahi mahi on a foil-lined cookie sheet. In a small bowl, combine dry seasonings, and rub over the top of the filet, distributing evenly. Add more lemon or lime zest if needed. break apart the butter, and dot over filet evenly. Drizzle lime and lemon juice gently over the fish, not washing off the seasoning. Place in oven, and bake 15 minutes, checking for doneness at 10 minutes. The fish itself should not brown, just turn opaque, but the juices around the sides may brown on the foil. Remove from oven, squeeze two of the clementine quarters over the fish, serve garnished with remaining clementine wedges.

    Pairing a substantial fish with a flavorful vegetable, such as asparagus, creates a memorable meal. Frozen asparagus speeds up the process, allowing for perfect timing of the main course and the side. Microwaving veggies to steam them helps to create fewer dirty dishes -- VERY important in a small space!

    Quick Garlic Asparagus

    5 oz. frozen asparagus spears
    2 cloves of garlic, crushed
    Salt and pepper to taste

    In a large, microwave-safe bowl, toss together asparagus, garlic, salt, and pepper. Add 1/8 cup of water to bowl, and cover with paper towel. Microwave on high 5-7 minutes, rearranging asparagus occasionally. Because all microwaves are different, times aren't exact. The main goal is to have the asparagus be crisp-tender and heated through.

    I recommend rounding out the meal with small baked potatoes served with salsa and fat-free sour cream.

    Wednesday, July 4, 2007

    Happy Independence Day!


    As a government student living in the birthplace of the American Revolution, one might be inclined to think that I'd be spending the day reflecting on the actions of our forefathers in this city 231 years ago, and how that laid the foundation for our nation as we know it today. At least, I thought I would....but no. Friends are here, and time with friends calls for GOOD FOOD!

    Said friends are from Kansas, so what better treat than a seafood-infused menu, including some make-ahead items:
    Shrimp Cocktail
    Crackers with chive-pineapple cheese and smoked salmon
    Tortilla chips with salsa and guacamole
    Assorted cookies (including remaining chocolate chip!)

    The inspiration for the chive-pineapple cheese comes from several cheeseball recipes I've read. While I enjoy the flavor of cheeseballs, the consistency makes for awkward snacking. To facilitate the snacking-while-visiting, I've substituted whipped light cream cheese.

    Chive-Pineapple Cheese

    1/4 c. walnuts or pecans
    16 oz. fresh pineapple plus 2 teaspoons sugar, or 8 oz. canned drained pineapple
    8 oz. Whipped Light Cream Cheese
    1/2 t. Tabasco
    1/2 oz. fresh chives
    1/2 c. Light Shredded 3-cheese blend or cheddar
    Salt and Pepper to taste
    4-6oz. Smoked Salmon

    In a food processor or blender, pulse walnuts until ground, remove and set aside. If pineapple is not crushed, add to food processor and pulse until chunky. Add Cream Cheese and hot sauce, and pulse until mixed. Add chives, shredded cheese, salt, and pepper, and pulse until chives are chopped but not pureed. Fold in chopped nuts. Chill for at least 2 hours, or overnight, to allow flavors to mingle.

    After the cheese has chilled, cut some smoked salmon into 2 by 1/2 inch rough rectangles. Spread a thin layer of the cheese on one side of the salmon, and roll up. Set one each on crackers. Save remaining cheese mixture to serve with a knife or spoon and untopped crackers.


    When it comes to guacamole, the trend seems to be "the chunkier, the better". While that is a nice idea for sit-down meals, I don't like to worry about balancing delicate morsels of avocado and tomato on the point of a tortilla chip in a crowded setting. This recipe can go either way. So banish that seasoning packet, and follow this quick, easy recipe to fresh guacamole:

    Party Guacamole

    2 ripe avocados, peeled and pitted
    2 plum tomatoes, stemmed and quartered
    1-2 cloves of garlic, crushed
    1 T. lime juice, or juice of two limes
    1 t. lemon juice, or juice of 1/2 a lemon
    Fresh Cilantro, salt, pepper, and cayenne, to taste

    In a food processor, combine all ingredients. When well-blended and mostly smooth, you're done! For the chopped-style, simply chop the avocadoes and tomatoes into small cubes on a clean cutting board. Chop the cilantro. In a bowl, combine the juices, salt, and peppers. Add chopped avocadoes, tomatoes and cilantro to bowl. Cover with lid or plastic wrap, and toss gently to coat. Either way, allow to marinate in refrigerator for 1 hour prior to serving.

    ETA: We went out to dinner, so I have no pics of "the spread"! We came back so full, that the snacks have become our lunches this week....oops!

    Sunday, July 1, 2007

    Welcome to My Kitchen!


    You and I are entering at roughly the same time, as my husband and I just moved into our new digs -- all 700 square feet of 'em -- yesterday. This galley kitchen boasts adorable white cabinets, butcher block counters, no disposal, no dishwasher, and a 40-year-old 18 inch Hardwick/Robertshaw apartment range. Lucky me, right?

    Fortunately, this dinosaur comes with low miles, as it appears that I am one of five people in all of Boston who ever cooks or bakes at home.

    Getting started in any new-to-self rented kitchen can be hairy. The appliances never fit on the counter exactly as you imagined, the pots and pans suddenly forget how to nest, and immediately after signing the lease at least one funky quirk pops up -- ours being the fact that despite the appearance of under-sink storage, you can't open that (would-be huge, relatively speaking) cabinet.

    Once you've got your shelves and drawers wiped and stocked, you've only come 1/3 of the way. The biggest question remains: What is the story with the stove? How does it perform? Any gremlins in there? Rarely does the landlord know, and few of us get the chance to talk with the previous tenant (in my case, he didn't bake anyhow). I've found that the best way to learn a new stove is to bake something familiar, both low-cost and low-effort, that will accurately display the heating pattern (does the back get hotter? the left side?), and temperature tendency. What better thing to bake then chocolate chip cookies?

    Baking on a cookie sheet, particularly one that fills the majority of the oven, will show you where hot spots form, and choosing a relatively fast recipe prevents you from getting tired of monitoring the oven. At 9-11 minutes per round, I didn't feel compelled to run around the apartment settling other issues, and instead worked on becoming more familiar with where my stuff ended up. Also, baking a half batch does double duty as damage control (particularly if the oven doesn't heat at all) and portion control.

    Besides, what else so easily makes a new apartment smell like home, than the fragrance of fresh-baked chocolate chip cookies?

    Chocolate Chip Cookies -- Apartment-style
    Preheat oven to 375

    1 stick butter (flatter cookies) or margarine (poofier cookies), softened
    3/4 c. brown sugar
    1/2 t. vanilla
    1 egg
    1/2 t. baking soda
    1/2 t. salt
    1 1/8 c. flour
    1/2 bag (about 1 cup) of your favorite chips

    Using a fork, in a medium bowl, cream together the butter, sugar, vanilla and egg. Add soda and salt, and mix thoroughly. Gradually add in flour, scraping sides until fully incorporated. Then fold in the chocolate chips. Drop by rounded tablespoons onto ungreased cookie sheet. Bake 9-10 minutes, monitoring for doneness. Edges should be golden, but due to the high brown sugar content, these guys are a little more honey-colored than the usual anyway.
    Remove from cookie sheet immediately and cool on wire racks. Yields 2 to 2 1/2 dozen cookies.

    Enjoy!!

    I was pleased to find that this little oven really does the job, only heating the back slightly more...but it shouldn't be a problem...